Tuesday, 24 April 2018

Day of the Dead Carnival Workshop


In preparation for Portsmouth's annual carnival in August, which this year has the theme of 'Day of the Dead', I volunteered at Portsmouth Youth Centre to host a mask making workshop for the carnival performers / walkers to wear. Despite getting acrylic paint on my favourite jeans (remember your aprons folks!), I had a lot of fun helping the children create their own designs, and even made my own once they had left! This would be a good project for anyone with children to do at home, all you need is a plain mask, paint, glitter, glue and any other cheap crafty bits you desire such as gems and feathers.


Sunday, 1 April 2018

Postcards From My Neighbourhood


Throughout March 2018, Aspex Gallery in Portsmouth held a call for submissions for a postcard exhibition. Anyone of any age or ability who lives in Portsmouth (UK) could enter, and were asked to make A5 postcard with an image that visually responds to their neighbourhood. It could be a landmark, their favourite place, or something they either really love or hate about Portsmouth. Since my student residence is in Portsmouth, I decided to enter!

For my entry I had several ideas including Blue reef Aquarium and a door with the beach quite literally on its doorstep. In the end I decided I wanted to illustrate Clarence Pier as it's my favourite spot in Portsmouth. We learnt about its history as well as the general psychology of the beach in our 1st year visual culture lectures, and since then I became fascinated with the vintage seaside. The big blue and yellow arcade building is the most noticeable landmark of the pier with its striking colors, which is why I thought this would make a good design for a postcard.

I took some reference pictures, then made a watercolor wash background on an A5 piece of cardstock. The building was made on a separate sheet of card which I cut out and stuck onto my background to create depth after painting it with acrylic and adding Prismacolor / white gel pen details.I sent it off in an envelope before the deadline, and a few weeks later went to visit my postcard (which has now been gifted to the Portsmouth City Archive) at Aspex Gallery, only to find that it had been framed!


'Substance' Artist's Book Event


On the 18th of March 2018, Aspex gallery in Portsmouth held an artist's book event which featured books, poets and workshops held by established artists and students. From traditional books and zines to contemporary arts that question what a book really is, the event was a massive success.

One of my artist books, 'Underwater Carousel' featured at this exhibition. The underwater carousel is a metaphor of unrequited love; the dolphin, which can symbolise diligence, transformation, and love, constantly follows / chases after the sea horse which can connote stubborness and no hurry for advancement. An idea sparked by the lyrics "she said she won the world at a carnival, but she couldn't ever win me" from the song She Had the World by Panic! at the Disco, this artist's book captures a single frame of the carousel's endless spinning through the use of clay, wood, acrylic paint, and fabric.


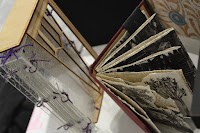
Here's some pictures of other exhibitor's work, including that of  Lee Shearman's micro library, university of Portsmouth, Artists Books Online and Transrational Publications!


Thursday, 21 January 2016

Book Cover Exhibition!


On the 13th of January 2016, Portsmouth level 4 illustration students held their first exhibition at 'The Fat Fox'. The one night event showcased book jacket cover designs for a range of classic novels such as Dracula, The Raven and Of Mice & Men. These were the final outcomes to the students' second project entitled 'line & colour'. Check out some clips and photos in this Youtube video: 


 The evening was a huge success completed with a raffle and live music! Here are some photos of the bands I took!


There are a few more on my facebook page where I photograph live music music events :D  https://www.facebook.com/media/set/?set=a.662010693941307.1073741847.531747256967652&type=3 

A post about the line & colour project will be up on here shortly!


Wednesday, 28 October 2015

[female] Ryan Ross Cosplay! (Halloween 2015)


First of all sorry about the bad quality pictures, I forgot to take my camera to the party I wore my cosplay to XD But anyway, My friend Serena suggested that I dressed up as Ryan Ross (ex Panic! at the Disco guitarist) this Halloween as she was going as Brendon Urie (singer of Panic!) and I was extremely excited about the idea! This post is about my process of making the costume!


I decided to go as 2005 Ryan from the live in Denver show which was recorded for a DVD. This is my favourite of his make-up looks and the fever you can't sweat out period was my favourite Panic! at the Disco era! I spent some time gathering reference photos and browsing charity shops for things I could use since I didn't want to spend a lot of money as I was only wearing the costume for a few hours at a Halloween party.

I ended up finding this shirt in British Heart Foundation for £3 which was such a great find because the material and pattern is very similar to that of Ryan's waistcoat! It was 3/4 sizes too big so I took in the sides to make it more fitted, then cut off the sleeves to begin turning it into a jacket.


To do this, I measured how wide I wanted the shoulder to be and used berry pins to mark out the arm holes. On the inside of the fabric I used a white pencil to draw a line where pins are, took the pins out and then sewed a new seem. I was sewing by since I didn't take my sewing machine with me to uni. I also removed the lapels using the same method.


For the 3D roses I bought some cheap hair accessories from an independent clothing store and some paper craft roses from Wilko's. I removed the clips and hair ties off the larger roses, and then painted them all with crimson red acrylic paint to match them to the jacket better and make them all the same colour. When dry, I pinned the bottom leaves to the jacket and sewed them down. Then I just took a long chain off of an old necklace with that I never wear and used safety pins to attach it to the jacket (the roses hide the metal) and then it was finished!  


I used the same acrylic mixed into a pot of water to dye a white [100% viscose] scarf that I purchased from Poundland a matching colour since I couldn't find one close enough in the shops. I just left the material in the watered down paint overnight then left it do dry and finished it off with a hair dryer to speed of the process and soften the fabric. 

Since my hair is half blonde, half purple, I bought a really cheap brown wig from ebay for £3/£4. The picture to the left shows what it was like when I bought it. I created a side parting and cut in layers, using hairspray to fix it in place. Although this was a synthetic wig, it seemed to work pretty well. For anyone wondering I used Treseme ultra fine hairspray in the strength number 4. I took away most of the shine of the wig using dry shampoo. This makes it look more realistic. When I wore it on the day of the party I just styled it with a brush/comb and more hairspray :)

For the make-up I applied my usual foundation & powder. Since I pluck out the ends of my eyebrows I was able to fill them into a shape more like Ryan's but this isn't a necessary step! I used a red lipstick as a base for the eye shadow although I wouldn't recommend this as it took a few washes to completely remove XD I went over it with a deep pink eye shadow and created a gradient with a dark purple. I lined my water line with a white khol pencil to make my eyes look bigger, and then outlined them with a black eye pencil. I applied a black eye shadow over this and blended it out to create a smokey eye, and then to darken it even more I outlined my eyes with a liquid eyeliner. I drew on the birds with liquid eyeliner too, and finally put on a rose red lipstick to complete the look!

In some photos Ryan isn't wearing gloves, and others he had black fingerless ones, but I really liked the ones he wears when he plays the banjo at the Denver concert. I looked in the costume store for some white butler-style gloves but they only had black ones. Instead I just got some woolen ones from Primark - the silver rhinestones reminded me of Panic's 2005 aesthetic. I had white versions of the paper roses I used for the jacket from The Range (although Wilko sell them too) and I just poked the stem through the gloves and then coiled it inside. This way I can remove the roses without damaging the gloves and wear them as everyday fashion when it's cold.  
And that was it! The shirt I already had (from New Look a few years ago) and I just wore black skinny jeans and boots with everything I had made! I hope this was useful to you if you are planning to make something similar and/or enjoyed reading this post ^.^ 


Printmaking: Etching


Etching is a print process where a design is scratched into the surface of a metal plate which is then inked up and printed in a press.

Before this is done you de-grease the metal using detol and chalk, making sure to rinse this off and dry it after. The metal is placed on a hot place to heat the metal and then coated with a type of wax called ground. You can then scratch in your image [in reverse] using an etching needle/scriber. For mine, I did a zombie Barbie as it was relevant to the ideas I was having for our current uni project [which I will post about in the future]. When you're finished you put your plate in an acid bath for about 10 minutes.
After this then wash the plate in water. Whilst you're doing this you could soak the paper you wish to print on in water too since it needs to be damp to absorb the ink, so make sure you use a paper with a decent gsm! Ink up the plate using oil based ink and cut card, making sure to press the ink into the groves that you scratched in, then use scrim and tissue paper to remove excess ink.

The type of press used is a roller press. Take your soaked paper out the water and squeeze out the excess by using a rolling pin over the paper in between several other layers of paper. Then place your plate face up on a sheet of tissue paper on the press, then your prepared paper, another sheet of tissue paper and finally etching press blankets. Turn the wheel or handle to operate the press and then your print is done! Leave it to dry and repeat as many times as you like! Here are some photos of the prints I made during our induction session: